Aesprite Can Only Draw Black and White
Pixel art is often viewed as just a retro style of graphics made for the purpose of nostalgia; a throwback to the early days of video games. However to me, and many other lovers of pixel art, it's the precision, intricacy and aesthetic born of meticulously placing each pixel onto a miniature stage that truly makes it a wonderful and fascinating art form–one that belongs just as much today as it did yesteryear. Outstanding pixel artists often remind me of artisans who create tiny ships in tiny bottles; achieving a lot with a little is always impressive.


Just as pixel art is an exacting art form, so too can it be helped along by equally exacting applications. Adobe Photoshop has been a common application of choice for pixel artists for a long time, but there exist today some fantastic alternatives, and those designed expressly for pixel art arguably offer the most.
In this article we'll be looking at five alternative applications for pixel art, and the tools they include that can help pixel artists along. Some of the key types of tools we'll be looking for are: selecting and resizing tools that don't add anti-aliasing, access to pixel art color palettes, pixel friendly shortcut tools for things like gradient creation and dithering, help with tilemap creation and animation, easily accessible color selectors for quick changes while drawing, pixel friendly shape drawing tools, real size preview pane, among others.
As far as deciding which software and feature set is "best" for pixel art, it goes a little further than just confirming the inclusion of the most commonly sought after tools, because there are roughly three subsets of pixel art creation to consider:
- Seamless tiles for games
- Sprites & animation
- Complete artworks
Whether an application is suitable to you can depend on which of the above types of pixel art you do. As we go through these alternatives to Photoshop for pixel art I'll try to fill you in on which applications have features well suited to each area.
The beauty of dedicated pixel art applications is they tend to be very inexpensive, so you don't even really have to choose a single application you want to use. You could get every application on this list and still have only spent $23.99, coming in well under our series per application price cap of $100.
Let's start taking a look at what we have to play with!
1. Pyxel Edit
First cab off the rank is Pyxel Edit. I'm talking about this program at the top of our list, despite its current beta status, because it has strong tools for all three of the pixel art areas we described in the introduction to this article–something quite rare.


It includes absolutely fantastic tile tools, (not only for seamless tile creation but also full tilesets and even exportable tilemaps), it has animation tools that give you all the essentials, and it allows you to create complete artworks as well. This is software built from the ground up with pixel artists, and in particular game artists, in front of mind.
Pyxel Edit has a lot of great features, but to me its tile creation tools are the real standout, so if you're involved in game development this might be of particular interest to you. You can define tiles as you go along and place multiple instances of them anywhere in your document. Then if you paint on one instance of a tile all other instances are updated in real time. This is very helpful for creating seamless textures as you can place tile instances next to each other and paint right over the seams.
Instead of painting over the seams between tiles, you also have the option to lock your pencil to only draw within the constraints of the tile you started on. And with the offset tool you can click & drag to shift the contents of an entire tile, with the displaced pixels wrapping around to reappear on the opposite side of the tile.
A big benefit of Pyxel Edit's excellent tile system is you can see how your tiles will actually look together in a real level, instead of working on your game art in a vacuum. You can watch this process in action in the video below.

Pyxel Edit's tile functionality means you can also use it as your main level design tool if you choose. It has the ability to export your tilemap data in JSON, XML or TXT format so, depending on the game engine and toolset you use, you may be able to load this data directly into your game projects. For example, you can use this importer addon for Unity, Haxe has an importer, and I understand Phaser has Pyxel Edit importing baked in.
As well as the great tile editing tools, Pyxel Edit checks almost all the boxes for the most commonly required tools for pixel art. It provides a 100% scale preview in the sidebar, it has a "clean 1 pixel line" setting for drawing lines you don't have to painstakingly tweak afterwards, it has rectangle and ellipse tools, easy color picker access with right-click or ALT+left-click, great color palette management with classic palettes preloaded, and very good selection tools. It also autosaves your work as you go along.
Duplication and movement of pixels is made very easy in Pyxel Edit with a handy set of shortcuts. Hit S to select an area, CTRL to move a selection of pixels, or CTRL+ALT to duplicate and move those pixels. When working with tiles you can also double-click any tile with the Select tool active to select the whole tile, making it easy to duplicate frames for adjustment.
Unfortunately, however, the software doesn't seem to have live mirroring, (though you can flip selections horizontally or vertically), or any type of dithering tools at present. Hopefully we'll see these features added as the project moves through its beta phase.
Another really standout set of features in Pyxel Edit is its color management tools, in particular its automated suggestions of different colors, which are generated by adjusting your current color's shading, lightness, saturation and hue:


These color suggestion tools are so useful I wish they were in every graphics application. Just by selecting a good "seed" color right at the beginning of your project you can get a glimpse of how your entire color palette might look.
Another great tool in Pyxel Edit is its Color Replace tool, which allows you to easily change your mind about colors after you've put them on the canvas. It will replace any pixels of the current secondary color, (equivalent to Photoshop's background color), with the current primary color, (equivalent to Photoshop's foreground color). So you just sample the color you want to change into the secondary slot, choose your new color in the primary slot, and draw over the pixels whose color you want to alter.
You also get some help with the creation of gradients: choose two colors in your palette and Pyxel Edit can generate a selection of graduating colors in between them. With these colors you can then paint out your gradients.
I've focused primarily here on Pyxel Edit's tile and drawing tools, but it also includes solid animation tools. The layout for animation is the same as for tile creation, whereby you work in a grid layout and place a frame of your animation into each one of the grid squares. You can create multiple animations within a single document, and you can control the time each frame in your animation is held. You can also turn on onion skinning, however it can only be used to show the frame before and after any particular frame.
And finally, if you don't want to create either a tileset or animation, rather you want to create a single artwork, you just select the "Single image document" option when creating a new file.
Pyxel Edit is a great tool, especially for people involved in game dev, and it can be picked up for $9 while it's still in beta. It runs on Adobe Air so natively it only works on Mac and Windows, however I've found it runs quite well on Linux via Wine also.
- Website: http://pyxeledit.com/
- Platforms: Mac, Windows, (also works via Wine on Linux)
- Price: $9 (Currently in beta)
2. Aseprite
Aseprite is the favorite tool of a great many pixel artists, and with its outstanding range of pixel art specific tools, that's for good reason. Everything about Aseprite is 100% focused on pixels–even the UI itself is done in pixel art style.
Where Aseprite shines is as a tool for sprite creation and animation. It has a powerful layer and frame based animation system with several features that are not present in many pixel art focused applications.

There are many animation features in Aseprite, too many to list here, but I'll give you a quick rundown. You have the ability to move multiple frames in your sequence to a new spot in the timeline, copy and paste a number of frames at a time, set onion skinning to show as many of your previous and next frames as you choose, loop or reverse sections of your timeline, move and copy frames (all layers) or cells (selected layers within a frame), and control frame duration. You can read about the full list of animation functions in Aseprite's animation docs.
As well as the animation features, all the most essential tools for pixel art are present in Aseprite. You have a 100% preview window that floats over your main window, a "pixel perfect" mode for drawing clean lines, great color palette management with the ability to drag & drop swatches to reorder them, easy color picking by holding ALT then left mouse clicking, filled and empty ellipse tools, filled and empty rectangle tools, and a series of really fantastic selection tools including rectangle and ellipse marquees, magic wand, lasso tool and polygonal lasso tool.
On top of that it has quite a long list of super useful drawing tools. For example, with the Contour Tool you can draw an arc or partial outline and it will automatically be closed and filled for you. With the Polygon Tool you can draw out shapes with as many straight sides as you want and it will be automatically filled. With the Spray Tool you can add randomized speckles.
With the Curve Tool you can draw pixel perfect curved lines with a method comparable to using bezier curves. With the Jumble Tool you can randomize the location of an area of pixels to rearrange them. And with the Blur Tool you can generate pixels around the edge of a shape that blur it with the background color.
While drawing you can activate either horizontal or vertical symmetry modes, great for things like character faces. However you're not stuck with said symmetry being around the center of your document. With either mode activated a line appears on your canvas and you can shift it to any position and draw your symmetrical shape there.


One of Aseprite's coolest features, in my view, is the "Shading" ink mode which allows you to select a series of colors and use them all to automatically layer shadows and highlights onto a shape. It also has an alpha compositing ink mode which allows you to blend colors together, and an alpha lock mode to enable painting only inside existing shapes on a layer.
Aseprite does focus on animation, but it's not without tile creation tools. It has an excellent tiled mode, whereby you can have an image repeat itself horizontally, vertically, or in both directions, allowing you to draw directly over seams to create seamless tiles.
Aseprite also has very useful color mode settings that allow you to choose between RGB mode for full color images, grayscale for black and white, or indexed mode where your colors will be confined to those in the currently active palette.
If you draw in indexed mode any color you choose will automatically replace itself with the closest color in your active palette. If you draw in RGB mode then switch to indexed mode your image will be converted to use colors from that palette only. This can be a great way to allow yourself to draw with a little more freedom, then refine your color palette down to be more crisp at the end of the process.
Aseprite has a color replacement tool, but in contrast with Pyxel Edit's color replace tool where you draw over the pixels you want to update, in Aseprite you just provide two colors and it will auto replace all pixels of the specified color at once. I personally feel both methods have advantages.
Aseprite was originally GPL so you can still get that open source version free of charge from GitHub, but it won't have the latest features. The most recent version is available for $14.99, and works across all three desktop operating systems.
- Website: https://www.aseprite.org/
- Platforms: Linux, Mac, Windows
- Price: $14.99
3. Piskel
Piskel is very straight forward and to the point sprite and animation creation software. If you want to get in and out fast this is a great solution. It's so quick, in fact, that it only takes about two and a half minutes for the essentials to be explained in this video:
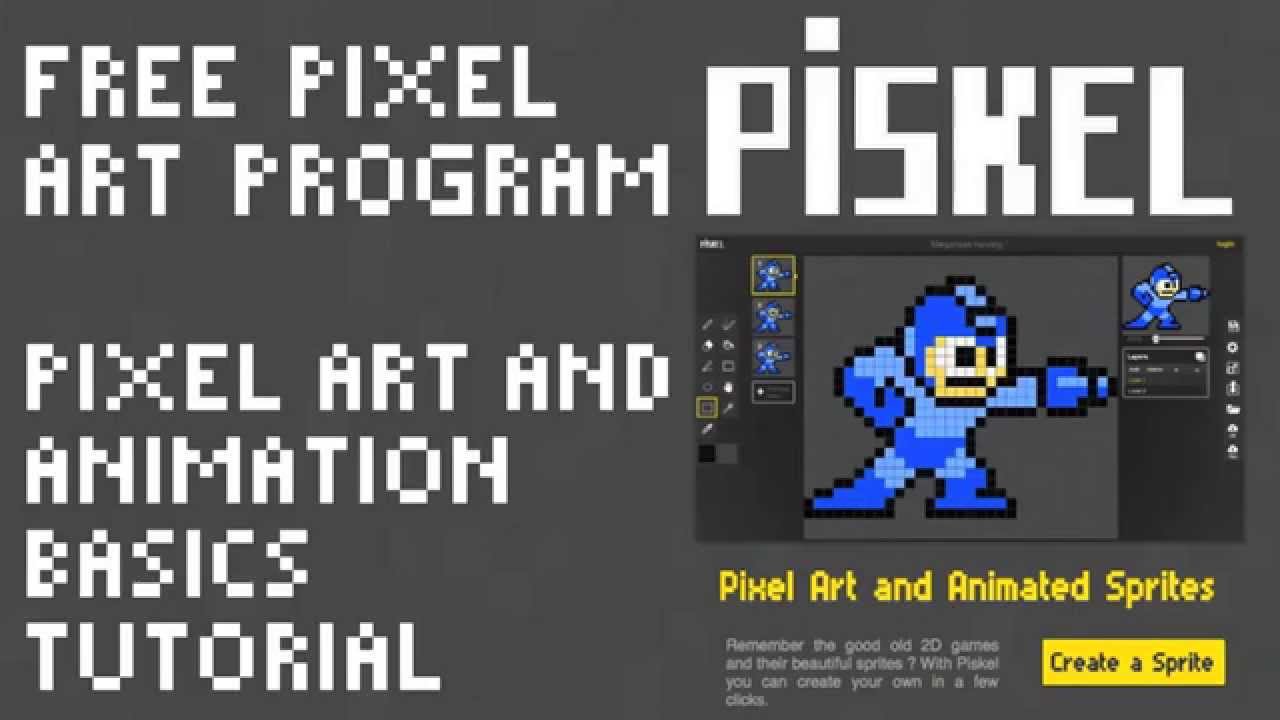
The focus of Piskel is definitely sprite creation and animation as opposed to tilesets or complete scene creation. It has a relatively limited set of tools, but it also has a direct approach that can be very efficient for sprite creation and animation. It's made particularly convenient given it has a fully fledged online version, meaning you can access it anywhere.
After drawing your initial character sprite, animations are created easily by just hitting the Add new frame button to the left of the canvas and adjusting an FPS slider to control your speed. Onion skinning is included, which is always a valuable feature in animation.
One thing to bear in mind is Piskel's pen tool can only be set to between 1px and 4px in size, meaning this software really is best for focusing on sprites and not large pieces like landscapes where you want to paint large areas such as skies quickly.
Of the common pixel art features you always like to have access to, Piskel includes a 100% preview in the right sidebar, it has rectangle, ellipse and stroke/lines tools, a vertical mirror pen for symmetrical drawing, and ellipse and shape selection tools. It also has a dithering tool, something very helpful yet surprisingly rare in pixel art applications.
Additionally it has a really great "shape selection" tool, which will identify any block of connected pixels of the same color. It's comparable to a magic wand tool, but is a little simpler to use and also allows you to drag the selected shape around immediately after selection without needing to switch to another tool.
As well as a regular fill tool, Piskel also has a modified fill tool that will alter the color of all pixels that share the same color, whether they're connected to one another or not. This is yet another approach to color replacement, the third we've seen in our article so far, and something incredibly helpful in those moments when you're fine tuning to get just the right color.
Another fantastic tool is the lighten/darken tool which semi-automates the process of creating highlights and shadows. Draw directly over existing pixels with this tool to create highlights, or hold CTRL to instead create shadows. You can either progressively shift the color of a pixel as you draw back and forwards over it, or you can hold down SHIFT to ensure the color is only tinted or shaded one step at a time.
Piskel describes itself as an online app, which can be very convenient, but if you'd rather work offline you can also get desktop versions for Linux, Mac and Windows.
- Website: http://www.piskelapp.com/
- Platforms: Linux, Mac, Windows, Online
- Price: Free
4. GIMP

GIMP is known primarily as an image manipulation program, so it's perhaps ironic that I didn't recommend it in our series entry on photo editing software but I am recommending it here. I personally find it to be fantastic for pixel art, with the right setup. I based my own setup on the video you see above, which is quite old now, but still an excellent starting point for pixel art in GIMP.
GIMP doesn't have some of the pixel art specific tools that dedicated software like Pyxel Edit or Aseprite have, but it does have some general tools that I find very helpful when doing pixel art. For example, GIMP's selection tool. Once you draw out a selection the marquee has transformation handles that make it easy to select the exact pixels you need. Its floating window mode is something many people turn off right away, but with it active you can create a second view into your document at actual size and nestle it right into your layout.
GIMP's color indexing mode can also be very useful for pixel art. If you're under time pressure and need to produce fast, you can draw something with a more traditional painting technique in RGB mode then convert it to indexed mode to have it translated into a restricted color palette.
For example, I've taken the machete from this free game vector art pack.
I scaled it down, with no interpolation, to get it to a size where the pixels will be nice and chunky. Then in the main application menu I went to Image > Mode > Interpolated and allowed a 256 color palette to be generated for me, with no dithering. Then I scaled the image back up, again with no interpolation, to the original size. Here's the before and after:


This could still use some cleaning up to give it the crispness expected from pixel art, but it's certainly off to a running start. Strictly speaking this is not pixel art, but for large projects like games you might need to create such a large number of assets that some shortcuts here and there are helpful.
You can also do things like switching in between RGB mode and indexed mode while working in order to speed certain things along. For example, you can draw out a gradient while in RGB mode, which will transition smoothly between the colors. Then you can switch to Indexed mode and enforce a color palette to get a pixel art friendly gradient effect instead.
Another helpful feature for game pixel artists is GIMP's new tiling symmetry mode. You'll need version 2.9.5 (compiled from source via Github) to access this. What it does is allow you to repeat whatever you are drawing every certain number of pixels. So if you are drawing a 16x16 tile, set the symmetry offset to 16px on both axis then you can ensure you have seamless tiling as you work:


GIMP isn't a dedicated pixel art application, but it has a lot to offer and even if you don't use it as your primary design software, you still might find some of these features slot right into your workflow.
- Website:https://www.gimp.org/
- Platforms: Linux, Mac, Window
- Price: Free
5. Krita
Krita might not seem like the obvious choice when it comes to pixel art but in my experience it can be fantastic. Out of the box it includes a selection of dedicated pixel art brushes, including a square brush, a round brush and a dithering brush.
A big help is the wrap around feature, making seamless tile creation a smooth experience. Just hitW on the keyboard and your canvas tiles in both directions, allowing you to paint over any seams. Another thing I find helpful in Krita is having a fully fledged set of high level color selection tools for fine tuning of color palettes.

Krita also has an excellent alpha locking system, allowing you to do things like drawing out a shape on one layer, then nesting other layers so their content is only visible through the previous layer's shape–a sort of masking, essentially. This makes adding shadows, highlights and details a much easier process, and allows for a workflow uncommon in pixel art apps.

Part of why I find Krita enjoyable for pixel art is its excellent support for a drawing tablet, while on the other hand I've found some pixel art applications have lag when using a tablet, or just overall feel more mouse and keyboard oriented.
Index painting is also available in Krita as it is in GIMP, with the advantage it can be used along with non destructive filter layers. However the setup for this technique is somewhat complex, as detailed in this tutorial.
And another feature Krita has is some basic vector tools you can use to draw out irregular shapes then have them automatically stroked with your selected pixel brush, a technique you can see used in the YouTube video at the start of this section. This is functionality you won't typically find in pixel art applications.
Krita does have basic frame by frame animation tools but they're still very new, and probably not the number one choice for pixel animation just yet. But Krita development is always moving fast, so keep an eye out!
For the creation of complete artworks however, Krita is a real prospect.
- Website: https://krita.org
- Platforms: Linux, Mac, Windows
- Price: Free
Wrapping Up
In my personal experience, the two strongest applications on this list are Pyxel Edit and Aseprite, and I don't feel you can really separate which of the two is "best". This is because if you are involved in game development and the creation of tilesets you'll find Pyxel Edit's specialization very helpful. But if you're a character and animation artist, you'll find Aseprite's specialization very helpful.
Both applications can do some of what the other specializes in, though I'd say Pyxel Edit is probably stronger in animation than Aseprite is strong in tileset creation. However Aseprite is probably stronger for self contained artwork creation than Pyxel Edit. Overall I'd suggest if you're involved in multiple types of pixel art, using the two together might serve you well.
I would class Piskel as a great application for when you want to get something done fast, or for when you're on the move and need to access a quality pixel art editor online.
As for GIMP and Krita, in reality they can't offer the same set of pixel art specific features that the aforementioned applications can. However they do offer a whole gamut of other features, the kind that come with software meant for fully fledged image editing or digital art. Whether you want to use one of these programs for pixel art will likely depend on how much you enjoy each one's overall toolset and UI.
For me I particularly enjoy that in each application I can use a pencil brush and my drawing tablet to sketch out a rough draft of what I want to create as though I were working on paper, then I can draw my pixel art over the top. And GIMP's ability to process images into indexed mode is particularly useful. Neither Krita nor GIMP are really top tier options for tile creation or sprite animation, but they can be great for drawing self contained artworks.
That brings us to the end of our roundup of Adobe Photoshop alternatives for pixel art. With a bit of luck you've found an application in this list that you're considering taking on as your new favorite pixel art editor!
Up Next: Animation
Adobe has two animation tools in its suite at the moment: Animate (formerly Flash) which allows for skeletal and keyframe based animation, and Photoshop which also allows for keyframe animation. However, just as with all the other software specialty fields we've looked at so far, there are several options for you to choose from when it comes to animation.
In the next article we'll be checking out some of the best software available for skeletal, keyframe, and frame by frame animation. Some of these programs have fantastic specialist tools that will make your life a whole lot easier while creating animations.
I'll see you in the next article!
Aesprite Can Only Draw Black and White
Source: https://webdesign.tutsplus.com/articles/adobe-alternatives-pixel-art--cms-28911
0 Response to "Aesprite Can Only Draw Black and White"
Post a Comment